Let’s get real, if you open a web page and see an impenetrable wall of text with no images, you will probably click away.
Even the most avid reader will squint and think twice before diving in!
Break It Up
Using images to break up your blocks of text not only makes your blog easier on the eye, it’s also a great opportunity to visually represent your story, show off your brand and appeal to audiences who learn visually.
Google also likes content that has variety. It likes images.
The Images Tab
Many of us will type a search into Google and go straight to the ‘Images’ tab – I often do this when I’m looking for inspirational quotes.
Images are an important feature of any content you share online.
There are few simple things you can do to optimize your images so they give your content a boost on Google:

Image Name
When you include an image in a blog post, give it a sensible name.
This starts by saving your images with a sensible file name. No one searches for ‘img20957578934789.jpeg’!
If you want to use the image to link back to a specific blog, include the title of the blog in the image name. If it’s an image you are using more generally, as a rule, ‘say what you see’. Give it a simple name that tells the viewer (and Google) what the image actually shows.
For example: If someone looks up an image of a ‘carrot’ they don’t want to see an image of an ‘apple’!
A silly, and obvious example I know, but think carefully about what’s in an image and name it appropriately.
Image Descriptions
When you upload your image, make sure you fill in the appropriate boxes with information.
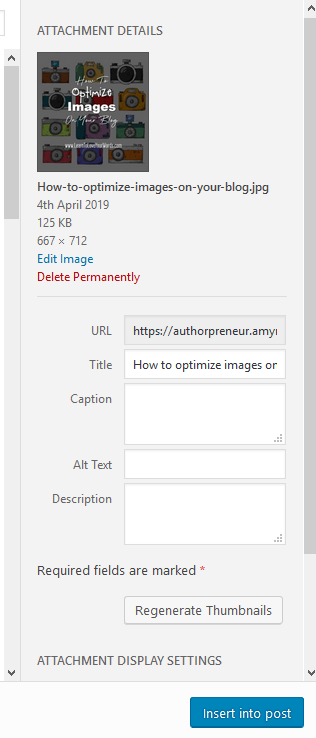
For example, on WordPress, when you upload your image this box pops up:

- A ‘caption’ appears under the image, this is a good place to credit any image source.
- Alt Text: The purpose of this option is to describe images to visitors who are unable to see them. This includes screen readers and browsers that block images, but also users who are sight-impaired. If you have given your image a sensible ‘say what you see’ name, copy and paste it into this box.
- Description: This allows you to include many more words to describe the contents of the image. Include the title of the blog and any other useful keywords that are relevant to the content.
Image Size
- Your images need to be of a high enough quality that they are clear on different screen sizes, but they shouldn’t be so big it takes 5 minutes for them to load!
- Large images slow down websites and people will click away when a website isn’t responsive enough.
- Consider the shape of your image too.
- Landscape oreintated images make good headers.
- Portrait and longer images make good Pinterest pins.
- Square pictures work well on Social Media (i.e. Twitter and Instagram)
- Canva is a useful free tool to get the right sized template for the right purpose
Here is a really handy ‘Image Compressor’ tool (thanks to Dana Sallow for emailing the link)
How Do I Compress An Image?
Visuals are essential but it’s still all about words because Google needs words so it can index your content.


Awesome Amy!,
Keep up the good work, i loved this post!
Best,
Dana.
Thank you and thanks for the links and feedback 🙂