There is so much to do when you take on a new allotment. It can be overwhelming. I’m breaking things down into baby steps; projects I can do in a day, or work on at home and take to Hen’s Tooth.
May is the time to start off climbing beans, to plant out in June.
I picked up some seed packets at Wilko and from DT Brown (it’s worth joining their newsletter to get the free P&P offers) and started them in small pots in May. I also acquired runner bean plants from my mother in law, who had some spare.
Part of the fun and the challenge of having an allotment is to be as sustainable as possible. To reuse and re-purpose things. I have as shed at home full of random bits and bobs for just such projects. I also like wombling for things and cruising around charity shops and junk shops grabbing random bargains.
The Bean TeePee
I had some old decorative fishing nets from a previous interior design project. That sounds very grand, they used to be hanging in my seaside themed summerhouse.
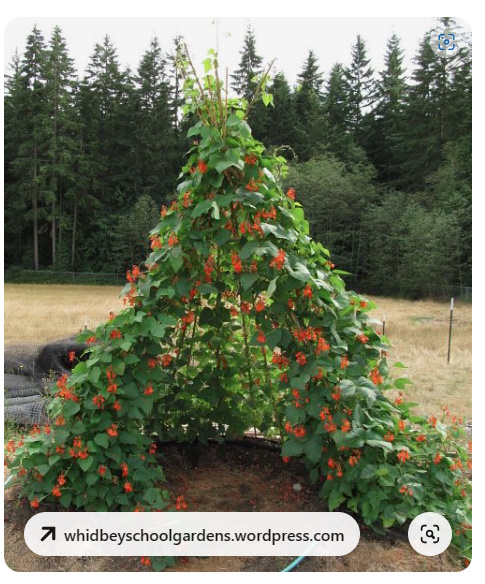
I’ve seen pictures on Pinterest of teepees made out of climbing beans. Ever since I was a kid, I’ve always loved a den, and thought it would be fun to create my own little green den at Hen’s Tooth.
How To Build Your Own Bean TeePee
The Teepee starts with a solid structure for the beans to climb up.
Step 1: Start by choosing where to put the teepee. A flat (ish) piece of ground. Somewhere with enough sunshine for the beans to thrive and somewhere you would be happy to hang out. No one wants to sit in a teepee that overlooks a wall, or some smelly bins!
Step 2: Prep the ground – cut down or pull out any weeds. Because my allotment it no dig, I trimmed back the weeds to ground level then laid some cardboard over the ground. I then coved this with wood chip. I cleared space around where the teepee would sit ready to plant up.
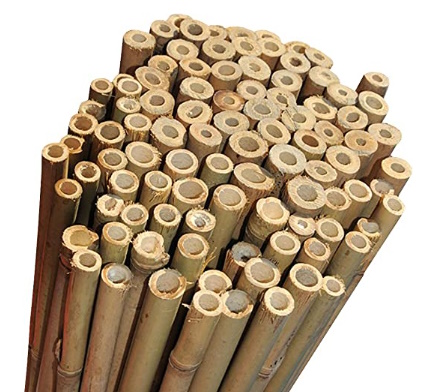
Step 3: Get 4 to 6 really long bamboo canes or other branches – at least 2m long.
Step 4: Push the sticks into the ground at even intervals, leaving a gap between 2 of the canes wide enough to get through. Push them in good and hard and angle them inward.
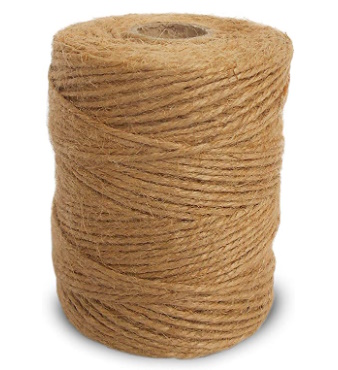
Step 5: Use wire or twine to string the tops of the canes together to form a pyramid shape. Make sure this is tied tightly to hold everything firmly in place. I prefer not to have unnecessary plastics in the garden, so avoid cable ties or plastic twine. Instead, choose a natural jut twine. It will biodegrade over time. It will be good for at least a year, and you can easily remake the teepee next season if you want to.
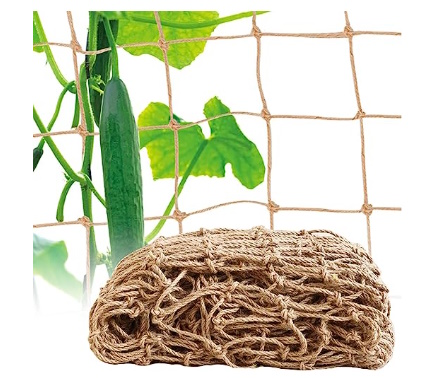
Step 6: Your beans need something to climb up. You can make a netting grid with the twine or get some netting. Lay the netting over the teepee shape, making sure it goes right to the ground and up to the top. Tie it in place with small pieces of twine.
Step 7: The plants.
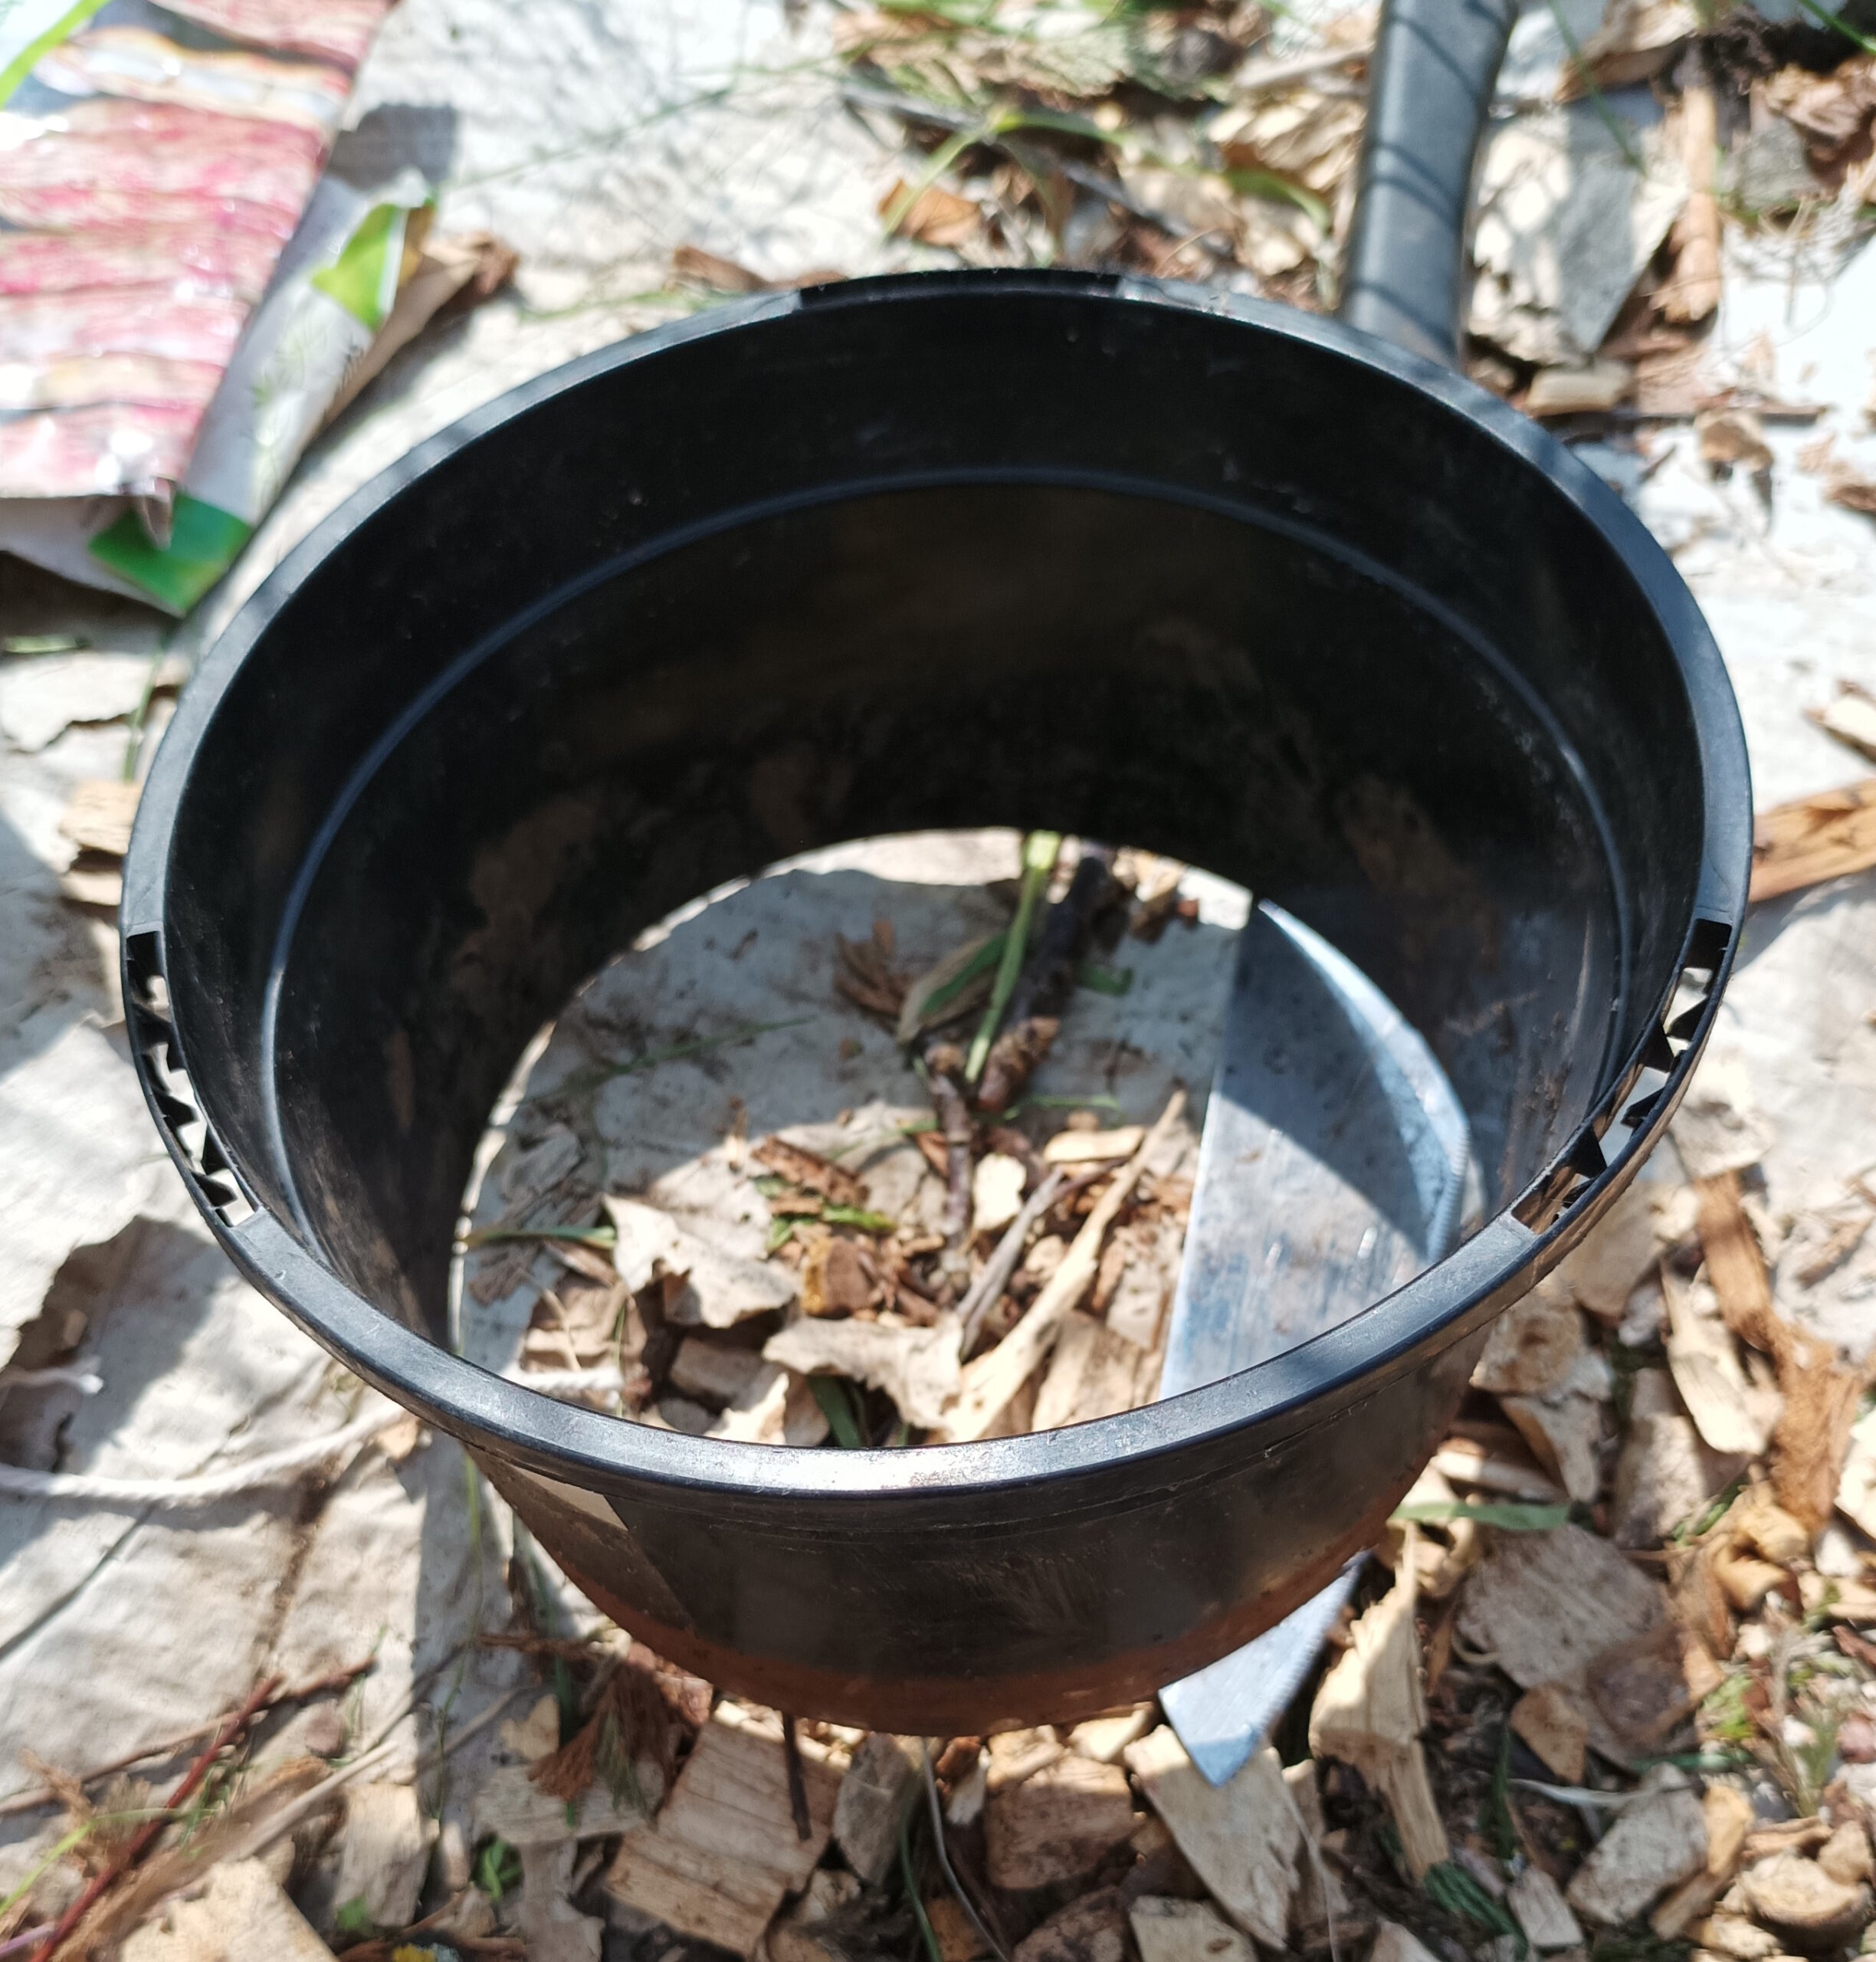
Because my allotment is no dig, I didn’t want to dig in trenches for the beans. Instead, I reused old plastic plant pots, roughly 15 – 20cm and cut the bottom out of them. I then dug small holes big enough for the pot and pushed them in, before topping them up with peat free compost. This way I effectively created ‘mini’ raised beds and minimized the soil disturbance.
In May/June you can water the compost then put the bean seed directly into the final growing position. Two beans for this size of pot is enough. Or, if you have already started the beans in pots and have seedlings, or have some bean plants, plant these directly into the watered compost, then give them a good water in.
Cutting the bottom from the pot gives the beans the chance to root deep into the subsoil to reach food and water. Beans are deep rooting plants and if I buried the whole put, their growth would be limited by eventually getting root bound in the pots. I want my beans to grow tall and strong so they cover the teepee.
Step 8: Water and wait. May and June have been unusually dry and hot in the UK this year, so I have been going to the allotment every couple of days to give everything a good water.
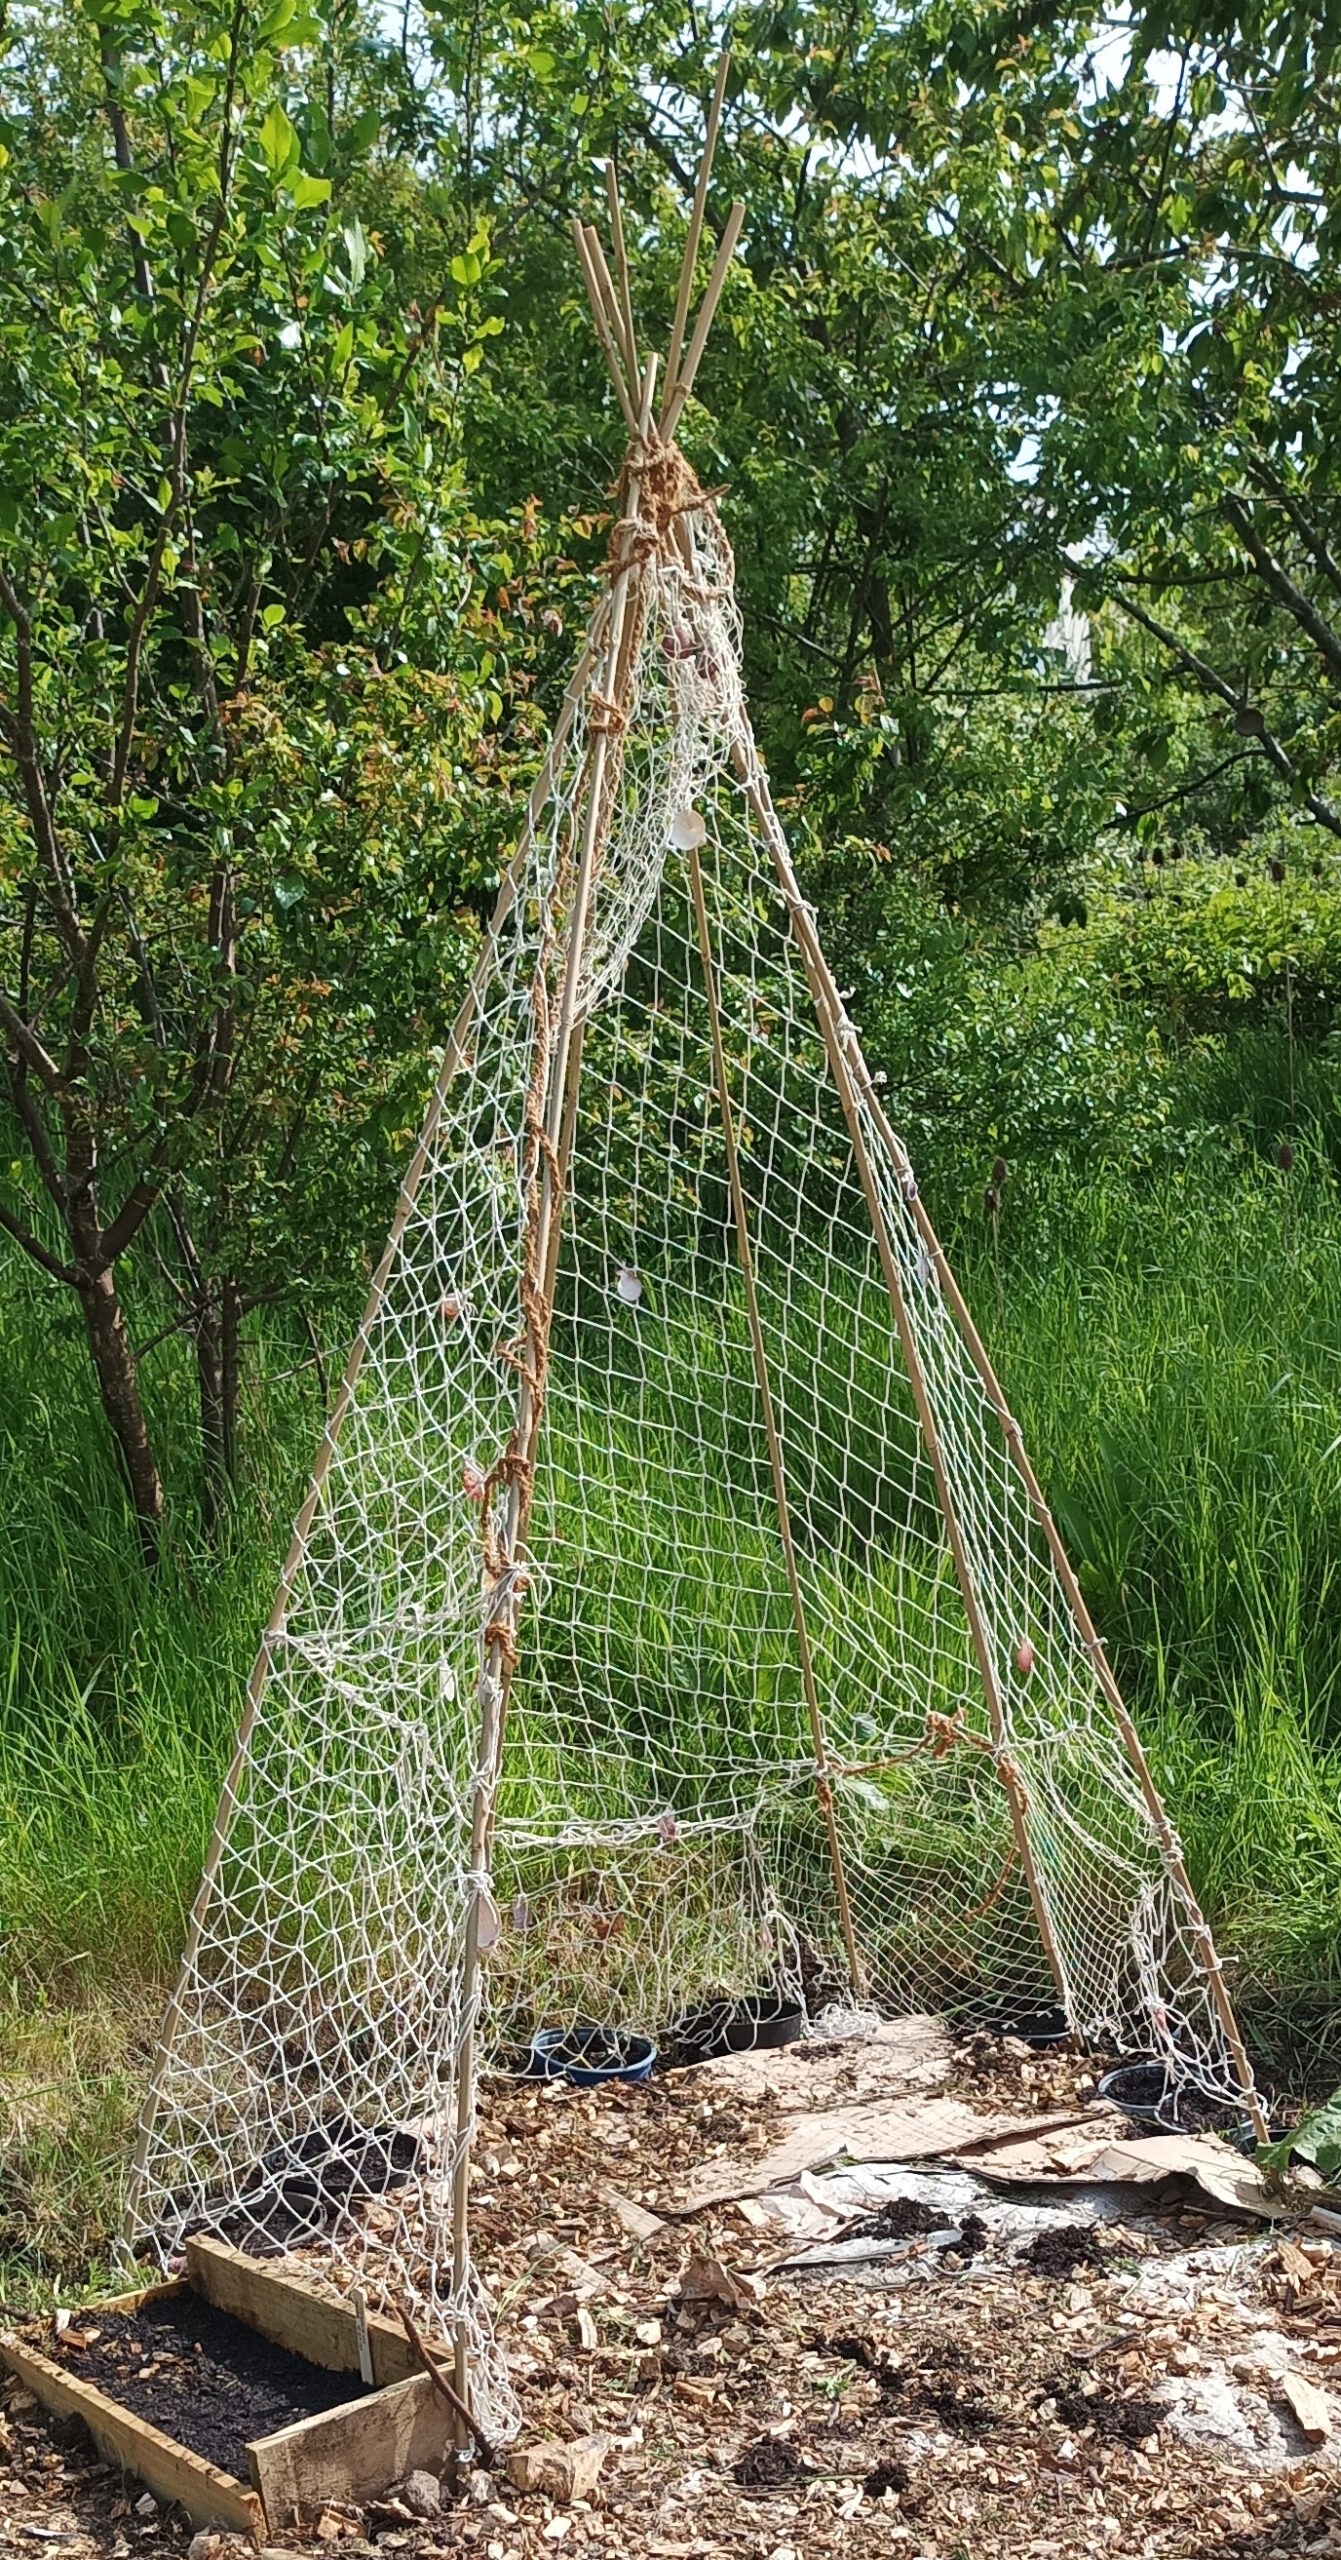
This is what it looks like now. Later in the year I’ll share the results!
Hopefully it’ll be something like this:
*As an Amazon Associate I earn from qualifying purchases. This post may contain affiliate links.