As an solopreneur, I’m always on a journey towards the next thing.
More and more I find myself wanting to embrace a simpler, sustainable life with a sustainable business true to those values.
Many of us have been doing a lot more home cooking and baking this year. With everything going on in the world, there’s something very satisfying about getting back to basics and doing small things to live a more self sufficient and sustainable life.
A Cream Tea, really is a taste of the summer. Making all the components yourself is all the more rewarding when you enjoy this summer treat!
The perfect English Cream Tea has three parts to it:
1) Jam (preferably raspberry or strawberry)
2) Clotted Cream (sometimes known as Devonshire Cream)
3) Scones
Here, I’m sharing recipes for all of these…
Of course, the only way to eat clotted cream is as a Cream Tea with scones and jam, both of which you can make yourself.
Scones are so simple to cook with only a few basic ingredients and jam is literally fruit and sugar.
I’ve included an easy scone recipe, jam recipes and how to make clotted cream in a slow cooker.
Let’s start with the cream as this is the part that takes a little more forward planning.
How To Make Clotted Cream In A Slow Cooker
As it takes 6 to 8 hours to bake the cream and then a couple more to let it set, make your cream the day before.
If you make a batch of it and store it in a sealed pot in the fridge it will keep for a good week or so.
If you have to buy a pot of full-price cream to make this, to be honest, it’s better value to simply buy a pot of clotted cream instead (unless you can’t get any)… however, where’s the fun in that?
This recipe is ideal if you have a glut of cream, cream that’s about to go out of date or you can pick it up cheaply (or free).
When I made it, I’d picked up a ‘yellow label*’ pot of cream from a store.
*Yellow labels = the section in the store where they discount items that are about to go out of date, or you follow a store assistant with a label gun around the shop!
What you’ll need
- A shallow heatproof (i.e. Pyrex) dish
- A slow cooker
- Double/heavy or whipping cream
- A lidded pot or jar for storage
Method
Clotted cream, also known as Devonshire Cream, is usually made overnight at low temperature in the oven. Rather than leaving the oven on overnight, which I just wouldn’t be comfortable with, not to mention the massive waste of energy, I wondered if it would be possible to use a slow cooker instead? They are designed to be left on for many hours – much safer and more efficient than an oven!
As ever, when I have a recipe question, my first act is to look on Pinterest.
There are several recipes on there to make your own clotted cream, but this is based on my own experiment:
- Pour the desired quantity of cream into a shallow, heatproof dish – Only make what you can eat and reasonable store!
- Place the dish in your slow cooker
- Set the cooker to the lowest temperature setting
- Leave for 6 to 8 hours (or overnight)
- The cream will bubble away, evaporating moisture and will separate into an oily surface and creamy curdles. It looks gross at this stage and the smell is rather sickly.
- Turn off the heat and let the dish cool down.
- Once cooled, either carefully pour the separated cream into a storage jar while it’s still warm and before it sets, or place the shallow ovenproof dish in the fridge with a lid on it.
- Allow the cream to set for about 2 hours, and voila! Better than the stuff in the shops, it has a familiar buttery crust and a gooey cream underneath.
I made my first batch by pouring the cream directly into the slow cooker, however, the cream that was in contact with the hot source caramelised and blackened around the ages. It still tasted fine, but didn’t look as good! This is why I recommend putting a dish in your cooker so the cream is not in direct contact with the cooking surface and heats more evenly throughout.
How To Make Scones for English Afternoon Tea

The basic scone base is simple, self-raising flour, baking powder, salt, butter and milk.
I like to make a bigger batch of the basic scone base, divide it and make sweet and savoury variations.
Sweet Scones for Cream Tea
Ingredients
Tsp Baking Powder
Pinch salt
225g / 2cups Self Raising flour
50g / 10tsp Butter
150ml / 2/3 cup Milk
Raisins or sultanas (optional)
2 Tbsp Sugar (optional)
Method
- Sift the flours, salt and baking powder into a large mixing bowl
- Add the butter and work it into the flour mix with your fingers to resemble breadcrumbs.
- If you like raisins or sultanas in your scones, this is the stage to add them, as many or as few as you prefer. I like a few and about a handful is enough, but add more if you desire
- If you like your scones on the sweet side, you can stir in a couple of tablespoons of sugar at this stage, too. Personally, I prefer the scones less sweet as there is plenty of sweetness in the jam you’ll be serving it with!
- Drizzle a little milk into the mix and stir it until it forms a thick dough. Drizzle in a little more milk as required. You only need a little milk to bind the dough to the point where it comes together without being sticky. If it gets sticky, sprinkle in a little more flour.
- Lightly flour a work surface and put your dough ball onto it
- Flatten the ball to about 2cm thick
- Using a round cookie cutter, cut out your scones
- Line a baking sheet with parchment paper, if you don’t have any, dribble a little cooking oil onto the tray, spread it around to cover the surface then add a thin dusting of flour. This is another way to prevent the scones from sticking to the pan without using paper.
- Leave a little space between the scones on the baking tray as they will rise and expand
- Bake at 180 degrees centigrade or gas mark 5 for 10 – 15 minutes until golden brown
Cheesy Scones for Savoury Afternoon Tea
Ingredients
Tsp Baking Powder
Pinch salt
225g Self Raising flour
50g Butter
150ml Milk
2 Tsp wholegrain mustard
125g Grated hard cheese. I like a mix of mozzarella and a strong mature cheddar, add more if you like it really cheesy!
Method
- Sift the flours, salt and baking powder into a large mixing bowl
- Add the butter and work it into the flour mix with your fingers to resemble breadcrumbs.
- Stir in the cheese
- Mix the mustard with a little milk. Drizzle the milk into the mix and stir it until it forms a thick dough. Drizzle in a little more milk as required. You only need a little milk to bind the dough to the point where it comes together without being sticky. If it gets sticky, sprinkle in a little more flour
- Lightly flour a work surface and put your dough ball onto it
- Flatten the ball to about 2cm thick
- Using a round cookie cutter, cut out your scones
- Line a baking sheet with parchment paper, if you don’t have any, dribble a little cooking oil onto the tray, spread it around to cover the surface then add a thin dusting of flour. This is another way to prevent the scones from sticking to the pan without using paper
- Leave a little space between the scones on the baking tray as they will rise and expand
- Bake at 180 degrees centigrade or gas mark 5 for 10 – 15 minutes until golden brown
Serve warm, cut in half with a knob butter on each half. They also work well with a cheese board, chutney and cold meat cuts.
Other Scone Ideas
Once you master the basic scone mix you can get creative.
Mix it up!
- Add herbs, nuts, spices, cheeses, dried fruit, even chocolate chips! Simply stir the additional ingredients into the dry mix (from step 3), then add a little milk to bind it.
- You could even make the scones vegan by using margarine instead of butter and nut milk.
Two Simple Jam Recipes
The point of an English Cream Tea is to have jam made from English summer fruit, so there really is nothing better than either strawberry jam or raspberry jam with your Cream Tea.
I have a massive raspberry bush by my back door which produces loads of gorgeous juicy raspberries from July to November, so I’ve always got a plentiful supply.
Raspberry jam is so simple because you don’t need to add any pectin and the jam to fruit ratio is 50/50, although I always use slightly less sugar because I prefer my jam on the more tart side.
I also have lots of strawberry plants in my garden, both ones I’ve planted myself and tiny wild strawberries that are native to the area. I find my own plants tend to produce lots of small fruits from June to July, so these are perfect for jam, being so small, they look a bit feeble otherwise!
Sterilising Jars For Jam
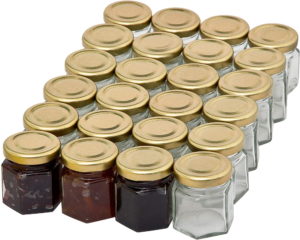
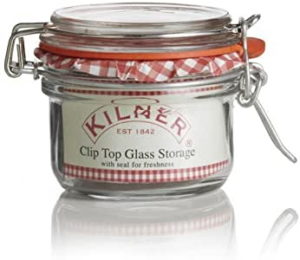
Find some clean jars and get them sterilising while you make the jam. Either old jars you’ve kept with metal screw-top lids, or Kilner jars. I prefer making lots of smaller jars rather than a couple of big jars, that way, you are less likely to waste opened jam and you can also give smaller jars as gifts.
There are a couple of ways to do this:
- If they come straight from the dishwasher they will be sterile. Take them out when the dishwasher has just finished a cycle so it is still hot and steamy in there, then immediately put the lids on the jars to stop nasties getting in. Rinse with hot water to warm them up when ready to use.
- Sterilising solution: Fill a washing up bowl with cold water and add a capful of sterilising solution (or whatever the pack instructions state), the type you find in the baby aisle of a store. Take the lids off your jars or rubber seals off Kilner jars and immerse everything in the solution for approximately 1 hour. Then, rinse everything with cold water. You want warm jars for bottling but if you pour boiling water straight into cold glass it is likely to crack, so sluice your jars with warm water to avoid the ‘shock’ of hot water, then boil the kettle and pour a little boiled water into the jars, put the lids on, give them a little shake and leave them until you are ready to use them. The steamy water will keep the jars hot and clean.
Raspberry Jam
Ingredients
- Raspberries
- Sugar
Method
Whatever quantity of raspberries you have, weigh them. If you have less than about 200g, it’s probably not worth the effort to make jam, as by the time it’s cooked and reduced, you will have less than a small jar! Jam is a great thing to make if you have a lot of raspberries, one punnet is probably not worth the effort.
- Weigh your raspberries. A mix of ripeness is ideal – some very dark and ripe, some only just going pink
- Weigh out an equal amount of granulated sugar (as raspberries have natural pectin you don’t need preserving sugar). Reduce the amount of sugar slightly if you prefer a sharper jam
- Put your raspberries in a large heavy-based saucepan over a medium hob and crush them with a spoon to start releasing the juices
- Pour in sugar, stirring as you go
- As the sugar dissolves, crush the fruit some more, the sugars will draw out the juices
- If you want a seedless jam, once all the sugar has dissolved, remove it from the heat and allow to cool slightly
- Press the seedy syrup through a sieve into a jug to strain out all the pips, and push as much pulp through as possible
- Pour the liquid back into the saucepan and return to the heat. Optional, squeeze a little lemon juice in to speed up the setting process and add a little more tartness
- Turn up the heat and boil the syrup rapidly for about 10 minutes (longer for larger quantities, less for smaller amounts). You need a deep pan as it will bubble right up to the top. You don’t need to stir it but you do need to keep an eye on it. Stirring will keep the bubbles down
- This is where you need to be vigilant, as there is a fine line between reaching setting point and overcooking the jam. You are looking for a loose but not too sloppy end result
- To test for set: Pull the pan off the heat and allow the bubbles to drop. Drag a wooden spoon through the residues on the sides of the pan, if it runs back down it’s not set, if it leaves a gully where the spoon was, you’re getting there. Take a small blob of jam out, drop it onto a cold plate and allow it to cool. If it doesn’t stay in a blob it’s not ready and needs to go back onto the heat and boil for a little longer. If it stays as a blob, let it cool then push your finger through the blob and if the surface crinkles, it’s ready. Keep boiling and testing until you reach the desired set point
- Once the set point is reached, remove from the heat and allow the jam to cool a little. While the jam is still liquid, pour it into your sterilised jars, seal and label. Leave the jars to cool. Store in a cool dry place until ready to use. Refrigerate once opened
Strawberry Jam
Ingredients
- Strawberries
- Sugar
- Lemon
Method
Whatever quantity of strawberries you have, weigh them. If you have less than about 200g, it’s probably not worth the effort to make jam, as by the time it’s cooked and reduced, you will have less than a small jar!
- Wash, hull and roughly chop your strawberries
- Weigh your strawberries. A mix of ripeness is ideal – some very dark and ripe, some still a little green
- Weigh out two thirds the amount of granulated sugar (i.e. 2 cups of sugar to three cups of strawberries)
- Put your strawberries in a large heavy-based saucepan bring them to the boil until juices start to run. Depending on how chunky you want your jam, crush them with a spoon or potato masher to start releasing the juices.
- If you like fewer and softer chunks, continue boiling and crushing the fruit until it’s the desired consistency. I like mine chunky so skip this step.
- Pour in sugar, stirring as you go.
- As the sugar dissolves, crush the fruit some more, the sugars will draw out the juices.
- Once the sugar has dissolved squeeze in the juice of half a lemon for approximately every 500g of strawberries
- Turn up the heat and boil the syrup rapidly for about 10 minutes (longer for larger quantities, less for smaller amounts). You need a deep pan as it will bubble right up to the top. You don’t need to stir it but you do need to keep an eye on it. Stirring will keep the bubbles down
- This is where you need to be vigilant, as there is a fine line between reaching setting point and overcooking the jam. You are looking for a loose but not too sloppy end result.
- To test for set: Pull the pan off the heat and allow the bubbles to drop. Drag a wooden spoon through the residues on the sides of the pan, if it runs back down it’s not set, if it leaves a gully where the spoon was, you’re getting there. Take a small blob of jam out, drop it onto a cold plate and allow it to cool. If it doesn’t stay in a blob it’s not ready and needs to go back onto the heat and boil for a little longer. If it stays as a blob, push your finger through the blob and if the surface crinkles, it’s ready. Keep boiling and testing until you reach the desired set point
- Once the set point is reached, remove from the heat and allow the jam to cool a little. While the jam is still liquid, pour it into your sterilised jars, seal and label. Leave the jars to cool. Store in a cool dry place until ready to use. Refrigerate once opened
The Devon or Cornish Way?
Now you have your cream, jam and scone, it’s time to assemble your perfect Cream Tea.
A hotly contested and controversial conversation: which is best, jam first or cream first?
This is a big deal if you are British and we have strong opinions about such earth-shattering matters!
The Devon Method:
Split the scone in two, daub on lashings of cream then top with jam.
The Cornish Method:
Split the scone in two, spread jam on first then top with cream.
Team Cream First
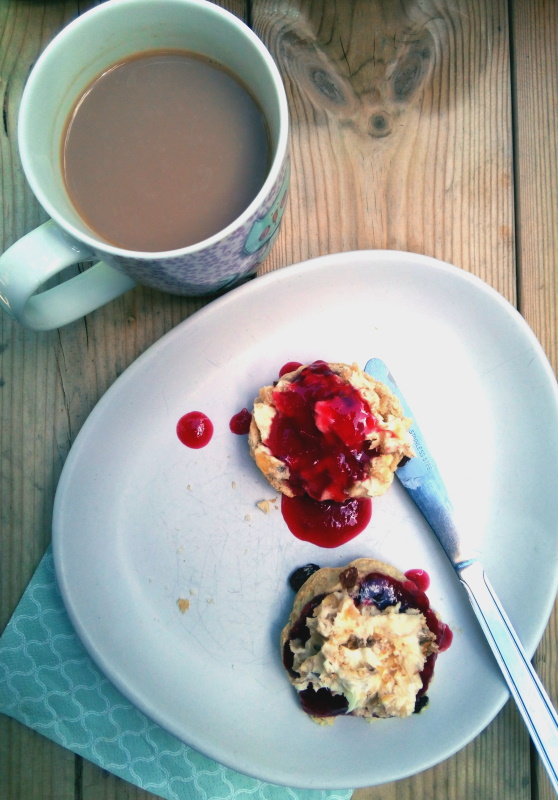
Personally, I like Cream First because I like a lot of cream and find it easier to add extra cream if that goes first. I also like a clear separation between the cream and the jam, I find if I do it the other way, the two tend to mix and it’s harder to add more cream because it just slides off the jam. Also, it looks nicer and more Instagramable with jam on top!
If you like lots of jam, go the Cornish method and spread the jam first, (you filthy animal), then top with a piffling amount of cream, (you weirdo)!
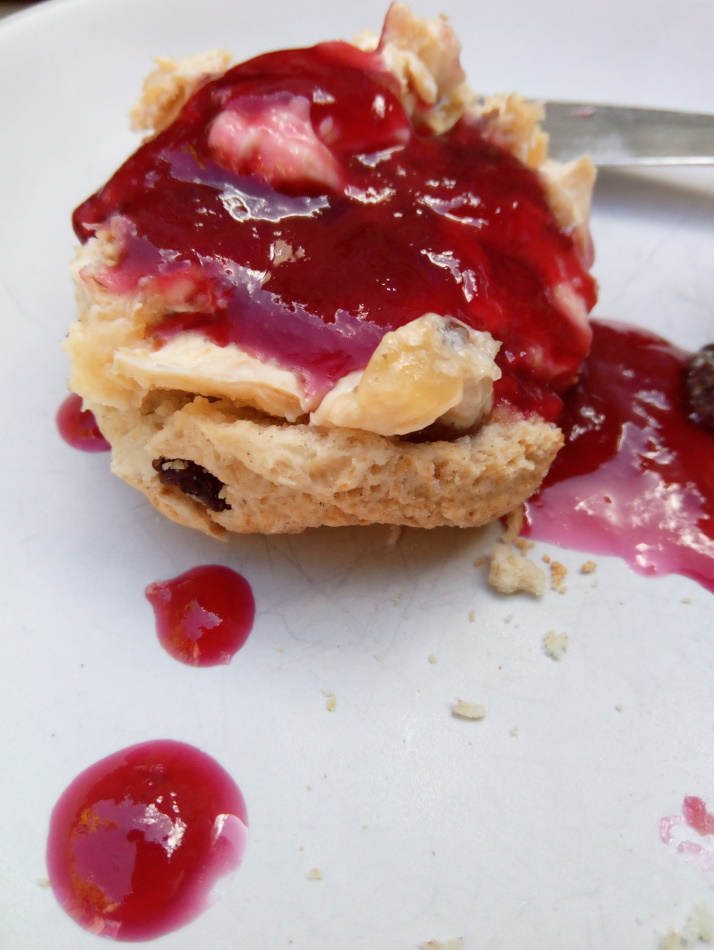
Although I absolutely love a good coffee, the only thing to drink with a Cream Tea is, of course, a good brew of tasty British Tea. This really is the taste of the summer!
 Flip This on Flipboard
Follow me on Bloglovin’
If you like what you’ve read, say thank you by topping up the coffee kitty here. £2.50 /$3 will get me a cappuccino, Thanks 🙂
*Disclaimer: This post includes affiliate links.


